 Pin It
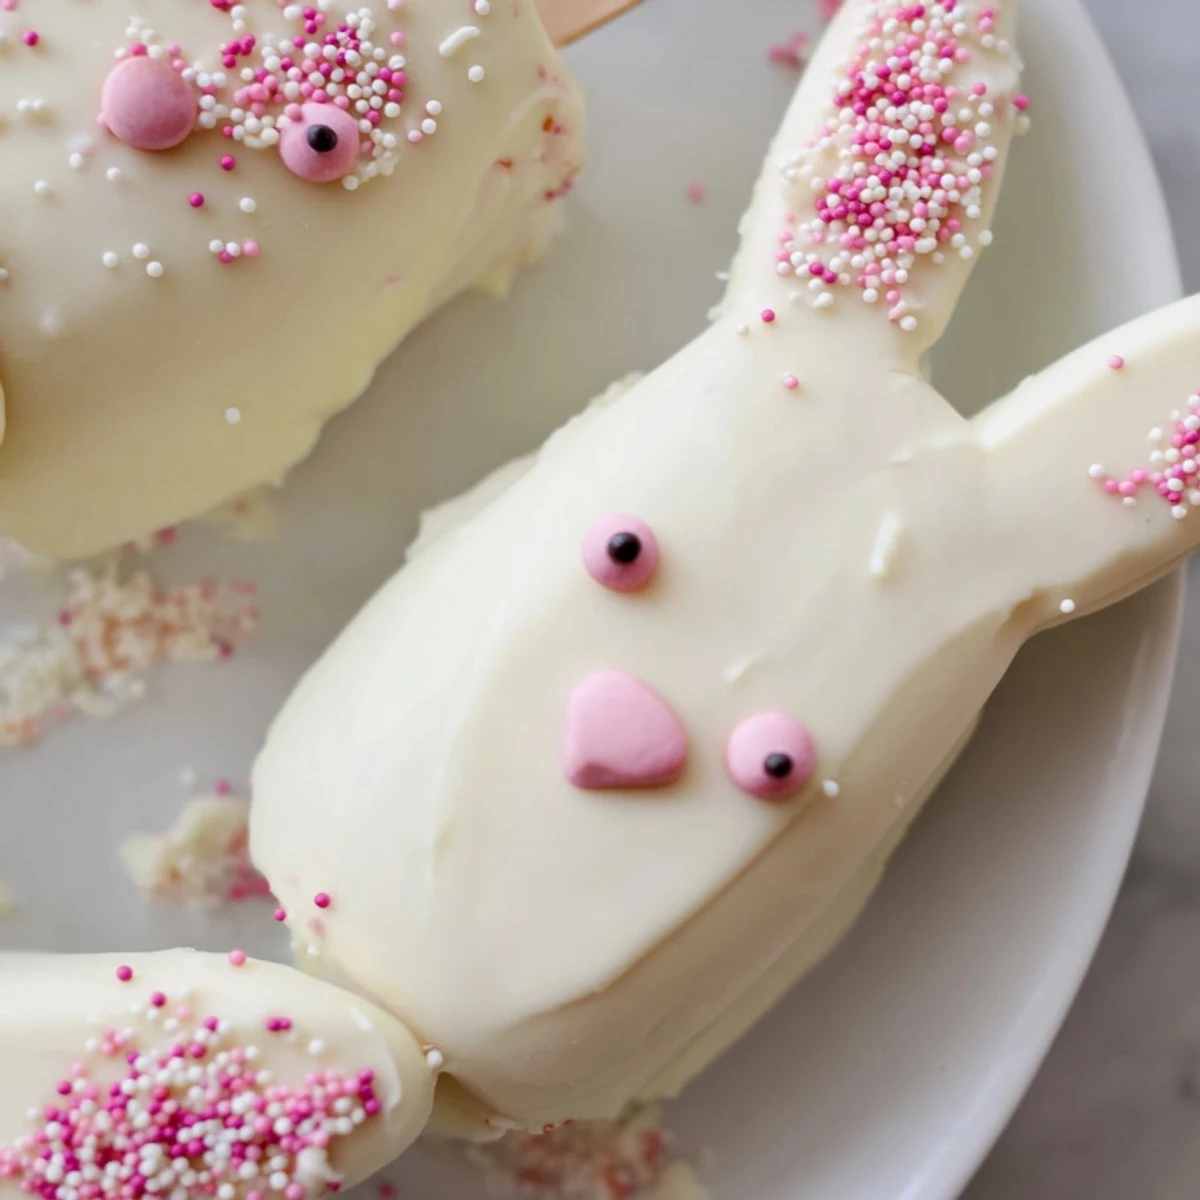
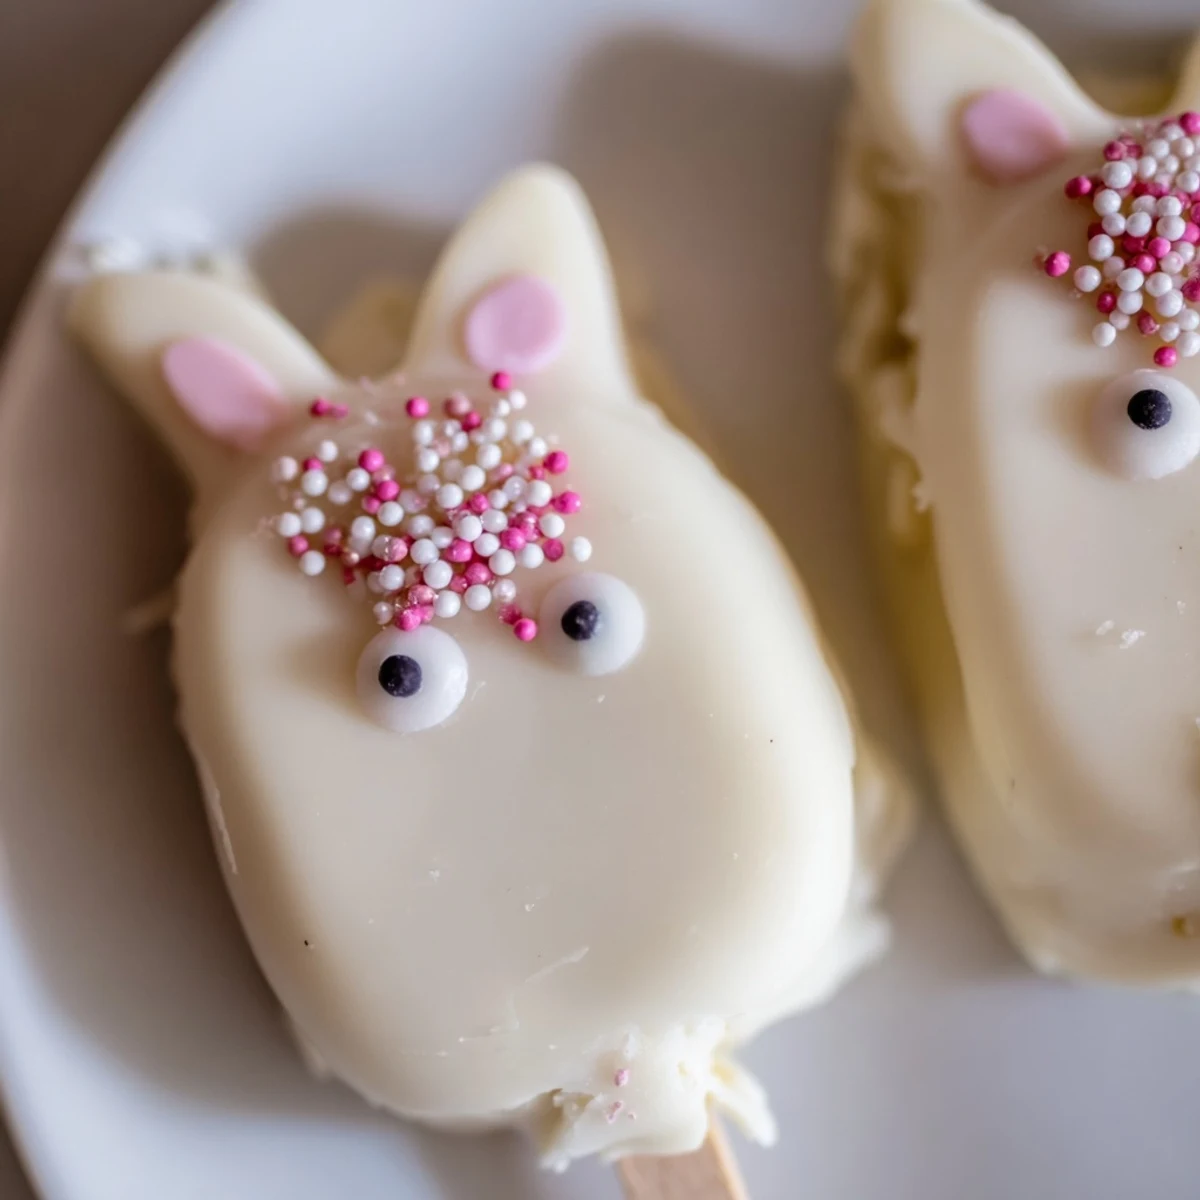
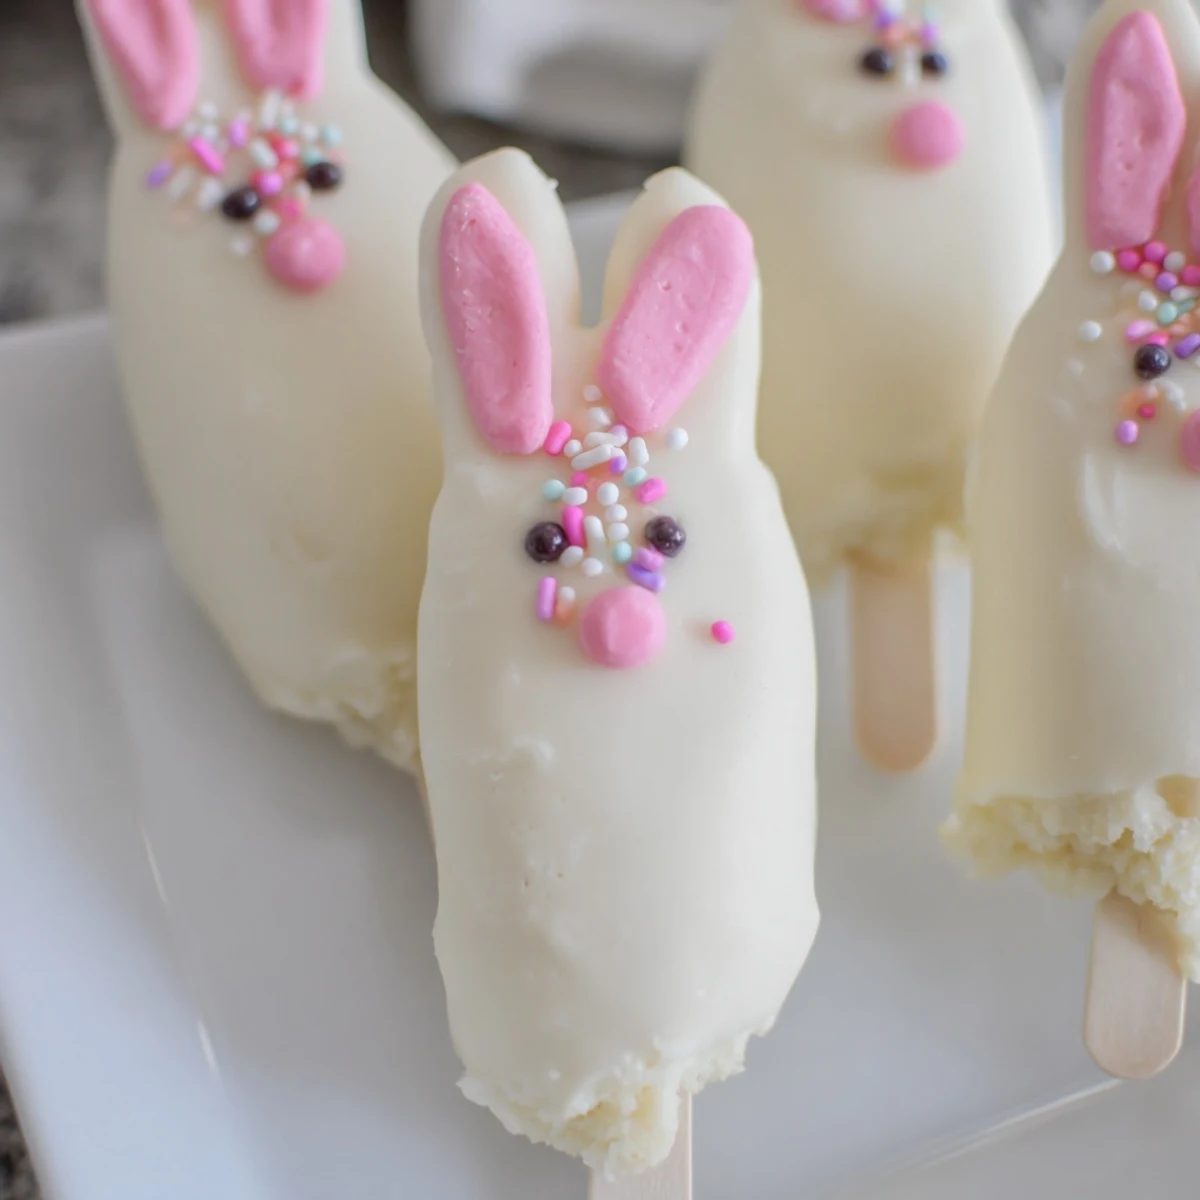
 These delightful bunny-shaped treats combine moist vanilla cake crumbs with cream cheese and butter, formed into adorable faces and dipped in smooth white chocolate. Perfect for Easter entertaining, each cakesicle features a stick for easy serving and endless decoration possibilities from candy eyes to fondant ears. The mixture comes together quickly and needs just 20-30 minutes of chilling before coating.
Customize colors with gel food coloring, marble the white chocolate with pink swirls, or swap vanilla cake for chocolate or lemon varieties. These handheld desserts store beautifully for up to three days, making them ideal for preparing ahead of your spring festivities.
Last Easter, my kitchen turned into what looked like a confetti explosion after my niece decided she wanted to help decorate bunny cakesicles. There were sprinkles everywhere, including in my hair, but watching her face light up when she made her first bunny with crooked ears made the mess entirely worth it.
I made these for a spring potluck and watched a grown man actually giggle when he bit into his bunny and found the surprise cake center. Sometimes the most childish desserts bring out the most genuine joy in adults.
Ingredients
- Vanilla cake crumbs: I have discovered that slightly stale cake actually works better than fresh because it absorbs the moisture without becoming gummy
- Cream cheese: Room temperature is non-negotiable here, as cold cream cheese creates lumps that make shaping impossible
- Unsalted butter: Softened butter helps bind everything together while adding that luxurious richness we all secretly want
- Powdered sugar: This tiny amount sweetens the dough just enough without making it cloying
- Vanilla extract: Pure vanilla makes all the difference between tasting like real food and something artificial
- White chocolate: Candy melts are easier for beginners but real white chocolate tastes significantly better if you are comfortable tempering
- Cakesicle sticks: Insert these before the chocolate coating step or you will have a disastrous time trying to attach them later
Instructions
- Mix the dough:
- Combine all cake ingredients in a bowl, mixing with your hands until the mixture holds together when squeezed. The texture should feel like play dough that can be shaped without crumbling.
- Shape the bunnies:
- Portion into eight equal pieces and form flattened ovals with slightly pointed tops for bunny ears. Chill them for at least 20 minutes because warm cake centers will slide right off the sticks when dipped.
- Prepare the sticks:
- Push each stick about halfway into the chilled cake shapes, being gentle to avoid cracks. A little twist while inserting helps the cake grip the stick better.
- Melt the chocolate:
- Heat in 30 second intervals, stirring thoroughly between each burst. White chocolate seizes quickly if overheated, so stop when there are just a few small lumps remaining and stir until smooth.
- Coat the bunnies:
- Dip each cakesicle straight down into the chocolate, pull up slowly, and tap gently against the bowl edge to remove excess. Work quickly because the coating sets fast.
- Add the faces:
- While the chocolate is still wet, press on candy eyes and sprinkles for decoration. The sticky surface acts like glue, so no additional frosting is needed.
- Set and serve:
- Let them harden completely at room temperature, which takes about 15 minutes. Store any leftovers in the refrigerator, though they rarely last more than a day.
 Pin It
 My daughter now requests these for her birthday instead of cake because she says regular cake is boring. The sticks make everything feel more festive somehow.
Making Them Ahead
You can shape the cake mixture up to two days in advance and store it tightly wrapped in the refrigerator. The dipping and decorating should happen the same day you plan to serve them for the freshest appearance.
Flavor Variations
Chocolate cake crumbs with dark chocolate coating creates a sophisticated version that adults love. Lemon cake paired with white chocolate and yellow sprinkles feels especially springlike and refreshing.
Decorating Like A Pro
Set up your decorating station before you start dipping the cakesicles because the chocolate starts setting immediately. Work with one cakesicle at a time and have all your decorations opened and ready to grab.
- Use tweezers for placing tiny candy eyes precisely where you want them
- Let excess chocolate drip for about 10 seconds before tapping to avoid thin spots
- Store finished cakesicles upright in a glass filled with uncooked rice
 Pin It
 These bunny cakesicles have become the one Easter treat my family actually asks for instead of traditional desserts.
Recipe Questions
- → Can I make these ahead of time?
-
Yes, these store beautifully in an airtight container in the refrigerator for up to 3 days. Prepare them a day or two before your Easter celebration for stress-free entertaining.
- → Do I need a special mold to shape the bunnies?
-
No special mold is required. Simply hand-shape the cake mixture into flattened ovals or bunny face forms. However, a cakesicle mold can help create uniform shapes if you prefer consistency.
- → Can I use different cake flavors?
-
Absolutely. While vanilla is classic, chocolate cake crumbs work wonderfully for contrast. Lemon, red velvet, or carrot cake would also complement the white chocolate coating beautifully.
- → What if my white chocolate coating is too thick?
-
Add 1 teaspoon of coconut oil or vegetable shortening to the melted chocolate and stir until smooth. This thins the coating without affecting flavor or setting time.
- → How do I prevent the sticks from falling out?
-
Ensure the cake mixture is thoroughly chilled before inserting sticks. Insert about halfway into the shaped portion, then refrigerate another 15-20 minutes before dipping to secure the connection.
- → Can I make these dairy-free?
-
Use vegan cream cheese, dairy-free butter, and dairy-free white chocolate chips or melts. The consistency remains similar, though melting times may vary slightly for alternative coatings.
