 Pin It
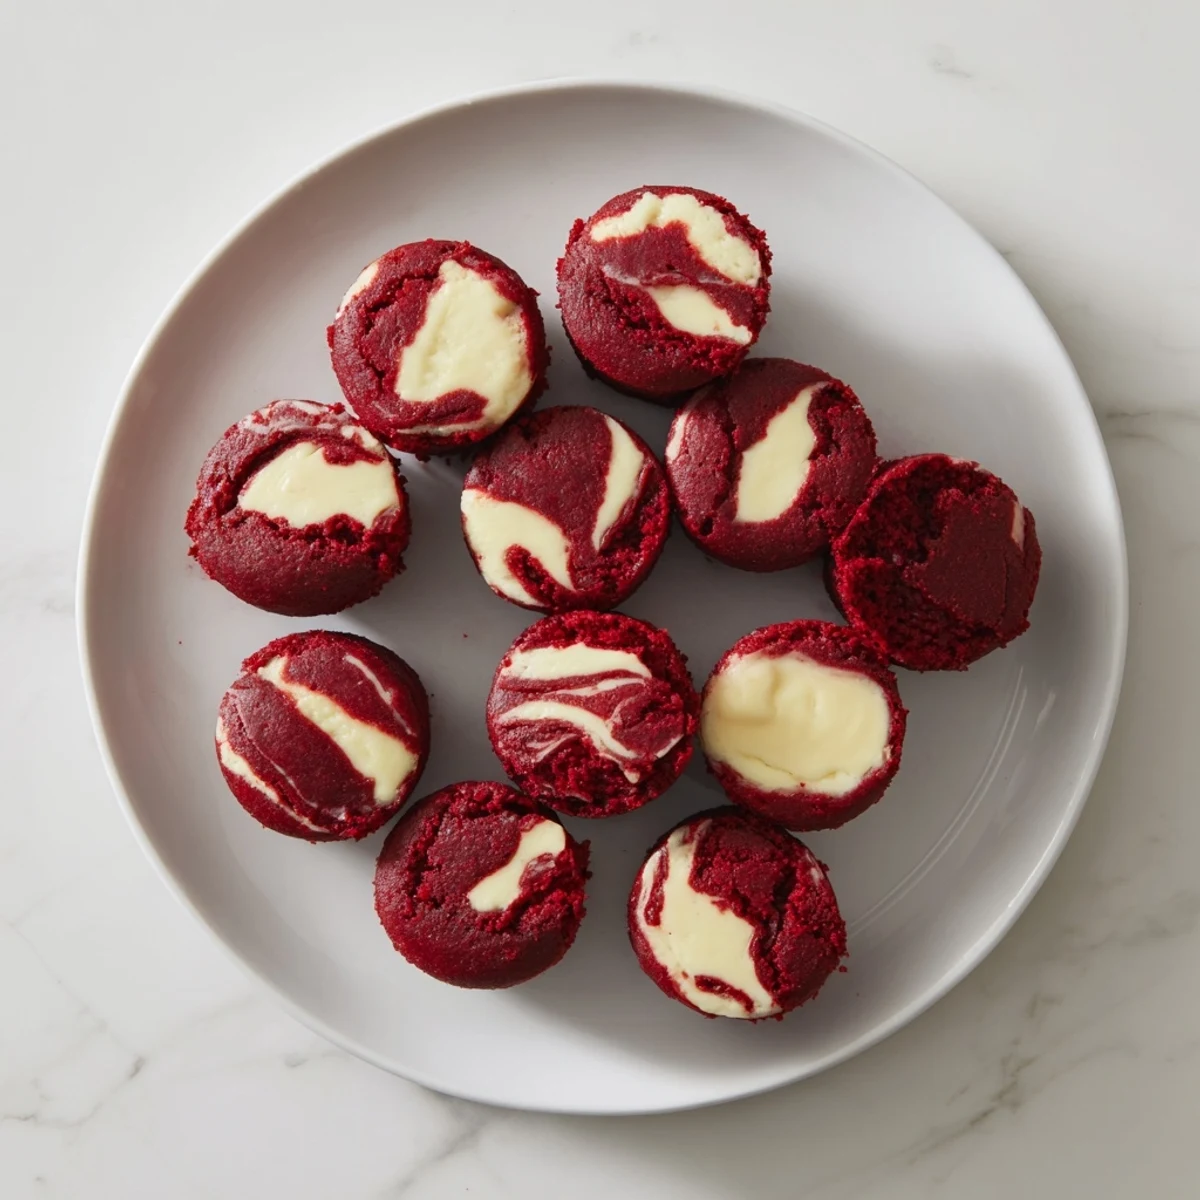
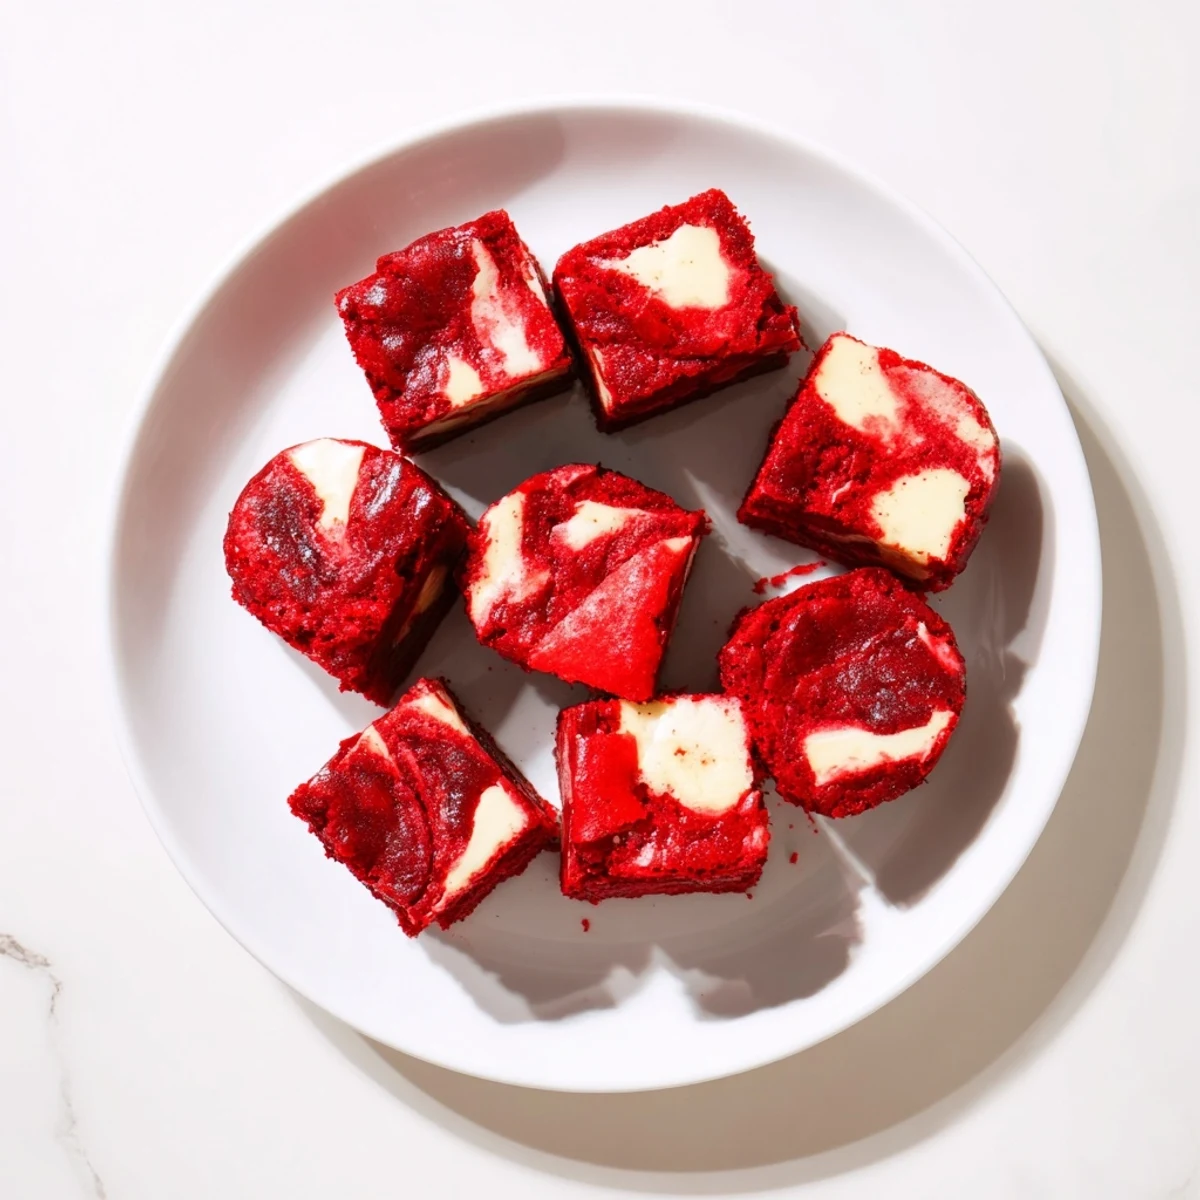
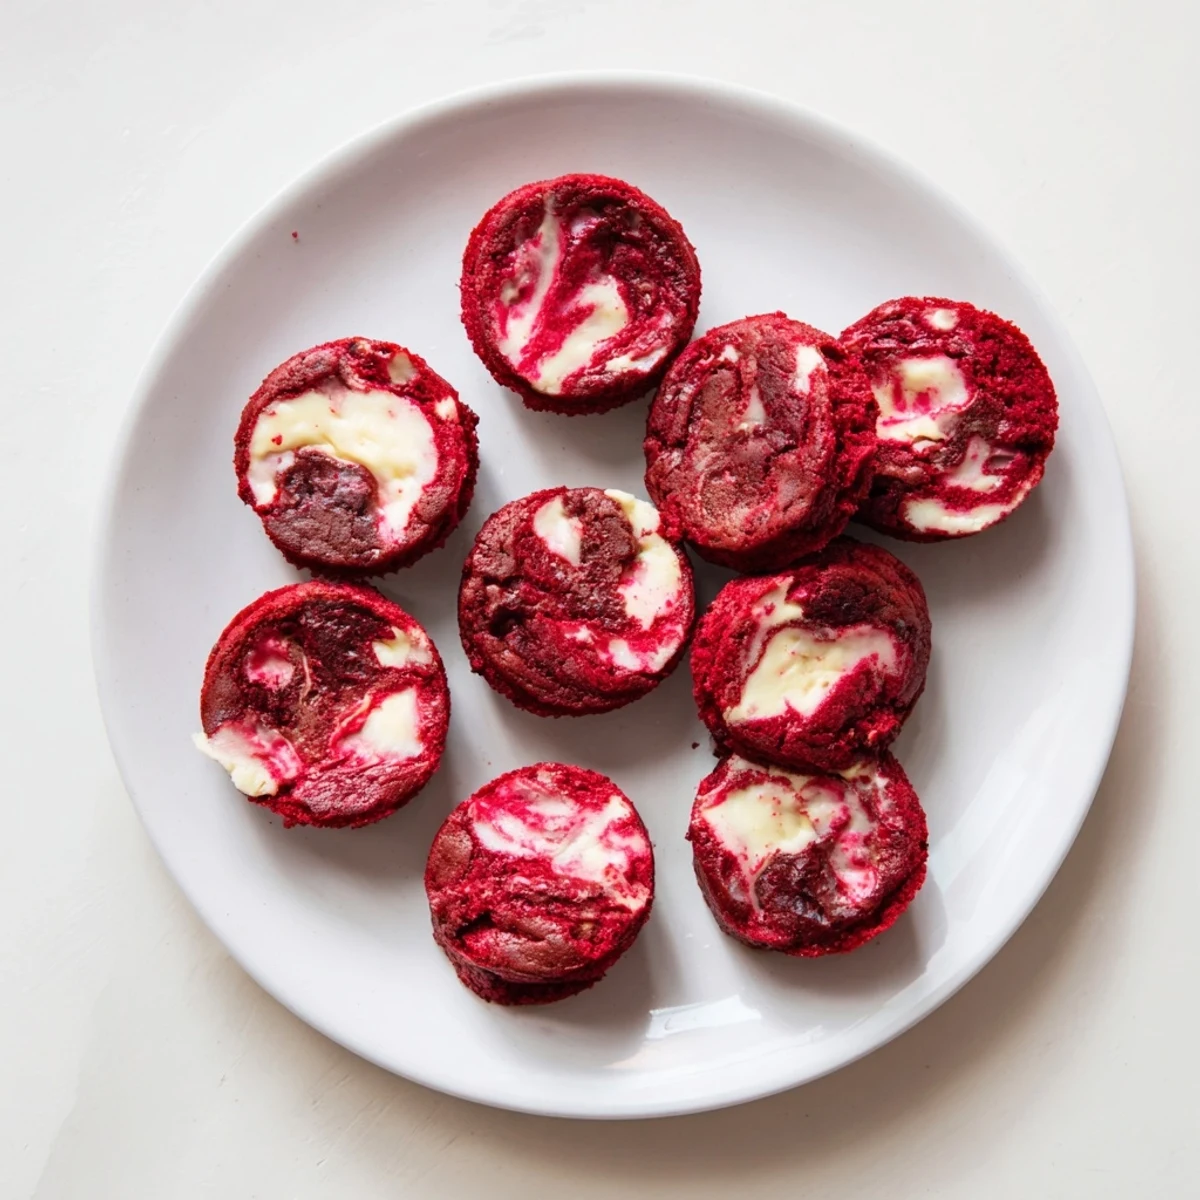
 These decadent red velvet brownie bites combine rich, fudgy chocolate with a tangy cream cheese swirl for an irresistible treat. The marbled pattern creates a stunning presentation perfect for parties or gifting. With just 20 minutes of prep and 25 minutes baking, you'll have 24 bite-sized desserts ready to serve.
The first time I made these, I was rushing to a holiday party and realized halfway through that regular brownies would be too messy to eat while mingling. My grandmother used to say presentation matters just as much as taste, so I grabbed my mini muffin tin and started experimenting with that classic red velvet flavor she loved.
Last Christmas, my sister claimed she ate seven of these before dinner even started. Now whenever I mention Im bringing dessert, my nephew asks specifically if its those little red brownies with the white squiggles on top. Theyve somehow become the most requested thing I make, which still surprises me since they come together so quickly.
Ingredients
- Unsalted butter: Melted butter creates that dense, fudgy texture we want in these brownies. I use salted butter sometimes and just skip the added salt in the dry ingredients.
- Granulated sugar: This amount strikes the perfect balance between sweet and the slight tang from the cream cheese. I tried reducing it once, but the texture just was not the same.
- Large egg: Room temperature eggs incorporate better into the batter, creating that smooth, velvety consistency red velvet is known for.
- Vanilla extract: Do not be tempted to skip this even with the red coloring. It provides that essential background flavor that makes everything taste complete.
- Red food coloring: Gel coloring gives you that vibrant restaurant quality red with less liquid. Liquid works perfectly fine too, just use a good quality brand.
- All-purpose flour: Sifting the flour prevents any lumps and helps it incorporate without overworking the batter, which keeps these brownies tender.
- Unsweetened cocoa powder: A little cocoa powder gives depth without overpowering that distinctive red velvet flavor profile.
- Salt: Just enough to enhance all the flavors without making these taste salty. It really makes the vanilla pop.
- Cream cheese: Make sure this is completely softened to avoid any lumps in your swirl. I take it out an hour before I start baking.
- Egg yolk: The extra yolk in the swirl makes it rich and creamy while helping it set beautifully during baking.
Instructions
- Getting everything ready:
- Preheat your oven to 350 degrees and line a 24 cup mini muffin tin with paper liners. This step always feels like the most tedious part until you are popping these out later and thanking yourself for making cleanup so easy.
- Making the red velvet batter:
- Whisk your melted butter and sugar in a medium bowl until they are completely smooth and glossy. Add the egg, vanilla, and red food coloring, mixing until everything is that perfect shade of red.
- Adding the dry ingredients:
- Sift in your flour, cocoa powder, and salt, then gently fold everything together just until no dry streaks remain. The batter will be thick and that is exactly what you want.
- Preparing the cream cheese swirl:
- Beat together your softened cream cheese, sugar, egg yolk, and vanilla in a small bowl until the mixture is completely smooth. Taking your time here ensures you get those beautiful clean swirls later.
- Assembling the bites:
- Spoon about one tablespoon of brownie batter into each muffin cup, then add one teaspoon of the cream cheese mixture on top. Do not worry about spreading it perfectly.
- Creating the marble effect:
- Use a toothpick or skewer to gently swirl the cream cheese into the red batter, maybe two or three passes per bite. This is the fun part where you get to feel like an artist.
- Baking to perfection:
- Bake for 23 to 25 minutes until the centers are set and a toothpick comes out with just a few moist crumbs. They continue cooking slightly as they cool, so do not overbake.
- Cooling completely:
- Let these sit in the pan for 10 minutes before transferring to a wire rack. The cream cheese needs this time to set completely so it does not smear when you take a bite.
 Pin It
 My neighbor smelled these baking through our shared wall and knocked on my door with an empty Tupperware container. Now we have a standing arrangement where I make these for her birthday every year, and she brings me fresh tomatoes from her garden in summer. Food really does bring people together in the simplest ways.
Getting The Texture Right
The key to that dense fudgy texture is taking the brownies out of the oven while they still seem slightly underdone. A toothpick should come out with moist crumbs, not completely clean. They set up beautifully as they cool and that slight underbaking is what makes them taste like they came from a bakery.
Making Ahead
These actually taste better on day two when the flavors have had time to meld together. I bake them the night before a party and store them in the refrigerator, then let them come to room temperature for about 30 minutes before serving. The cream cheese firms up overnight which makes them easier to transport too.
Serving Suggestions
Sprinkle a little powdered sugar over these right before serving for that extra touch that makes them look like they came from a fancy bakery. For a dinner party, I serve them on a white platter with fresh raspberries tucked around them for color.
- A scoop of vanilla ice cream alongside makes these feel like a complete dessert experience
- They pair beautifully with a cup of coffee or even a glass of red wine for adults
- Pack them in a pretty box with wax paper between layers for an impressive homemade gift
 Pin It
 There is something so satisfying about watching people bite into these and seeing their eyes light up at that swirl inside. Hope these become as special in your kitchen as they are in mine.
Recipe Questions
- → Can I make red velvet brownie bites ahead of time?
-
Yes, these store beautifully in an airtight container in the refrigerator for up to 4 days. The cream cheese swirl actually firms up slightly when chilled, making them even easier to handle.
- → What's the best way to achieve vibrant red color?
-
Use gel food coloring instead of liquid for a more intense red hue. Start with 1 tablespoon and add more if needed. The color will darken slightly during baking.
- → Can I freeze these brownie bites?
-
Absolutely. Wrap them tightly in plastic wrap and place in a freezer-safe container for up to 3 months. Thaw overnight in the refrigerator before serving.
- → How do I know when the brownie bites are done?
-
Insert a toothpick into the center—it should come out with a few moist crumbs but not wet batter. The centers should be set, not jiggly.
- → Can I use a regular muffin tin instead of mini?
-
Yes, but you'll need to adjust the baking time to 28-32 minutes and yield about 12 standard-sized brownies instead of 24 bites.
