 Pin It
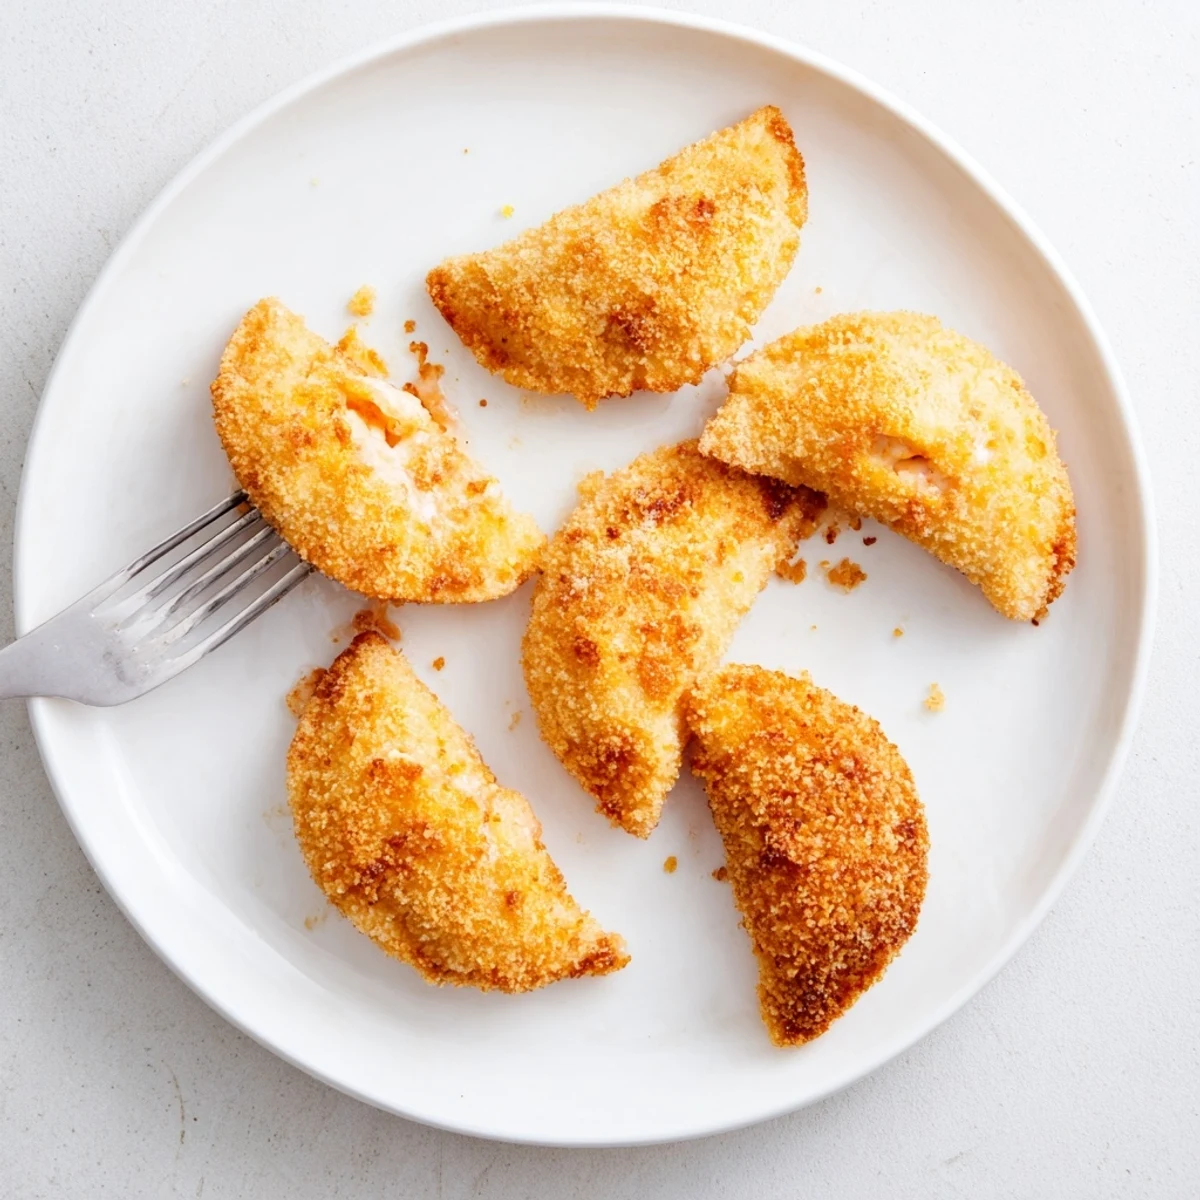
 These classic Portuguese turnovers feature a delicate pastry dough wrapped around a rich, creamy shrimp filling. The golden crust comes from a traditional breading technique followed by deep frying until perfectly crisp. Each bite reveals the smooth béchamel-based filling enhanced with fresh parsley, lemon, and sautéed aromatics.
Ideal for serving as appetizers, party snacks, or festive finger foods. The assembled pieces freeze beautifully, allowing you to prepare them ahead and fry directly from frozen whenever needed. A beloved staple of Portuguese cuisine, these seafood turnovers showcase the perfect balance of textures—crisp exterior, smooth interior, and tender shrimp throughout.
Standing at my avó's kitchen counter in Lisbon, I watched her transform simple ingredients into these golden crescents of shrimp-filled magic. The smell of butter and parsley filled her tiny apartment while she worked with practiced hands, explaining that the secret was patience with the dough and courage with the seasoning.
Last summer I made three dozen rissois for my daughter's graduation party. My Portuguese neighbor Maria stopped by to help me fold them, teaching me the trick of wetting my fingers to seal the edges perfectly. They vanished in twenty minutes flat and people are still asking for the recipe.
Ingredients
- 2 cups all-purpose flour: This creates the sturdy but tender wrapper that holds everything together without getting soggy
- 2 tablespoons unsalted butter: Adds richness to the dough and helps create that satisfying flaky texture when fried
- 1 cup milk: Whole milk works best here for a creamy dough that rolls out smoothly every single time
- ¼ teaspoon salt: Just enough to enhance flavor without overwhelming the delicate shrimp taste
- ½ cup water: Combined with milk this creates the perfect liquid ratio for a pliable dough
- 10 oz small raw shrimp: Fresh shrimp chopped into small pieces gives you those delicious bursts of seafood in every bite
- 2 tablespoons unsalted butter: The foundation for your creamy filling that makes these so addictive
- 1 small onion: Finely chopped so it melts into the sauce and provides subtle sweetness without chunks
- 1 clove garlic: One clove is plenty since you want aromatic warmth not overwhelming garlic flavor
- ¼ cup milk: Creates the silky béchamel base that binds the shrimp together beautifully
- 2 tablespoons all-purpose flour: This thickens your filling into the perfect creamy consistency that wont leak during frying
- 1 tablespoon lemon juice: Brightens the rich filling and cuts through the creaminess with just the right tang
- 2 tablespoons fresh parsley: Fresh is non negotiable here it adds color and a fresh herbal contrast to the rich filling
- Salt and pepper: Taste as you go since shrimp need proper seasoning to really shine
- 2 large eggs: Beaten eggs act as the glue that helps breadcrumbs stick perfectly for that golden crust
- 1½ cups breadcrumbs: Use plain fine breadcrumbs for the crispiest coating that wont burn too quickly
- Vegetable oil: You need enough for deep frying so dont be shy about the oil quantity
Instructions
- Make the dough base:
- Combine milk water butter and salt in a saucepan and bring it to a rolling boil. Dump in all the flour at once and stir like crazy until it forms a ball that pulls away from the pan sides.
- Knead and rest:
- Let the dough cool just enough to handle then knead it on a floured surface until silky smooth. Cover it with a damp cloth while you make the filling so it doesnt dry out.
- Cook the shrimp:
- Boil your shrimp in salted water for just 2 to 3 minutes until they turn pink. Drain immediately chop them into tiny pieces and set aside.
- Build the creamy filling:
- Melt butter in your skillet and cook the onion until soft then add garlic for one minute more. Stir in the flour to make a roux then gradually whisk in milk until you have a thick béchamel sauce.
- Finish the filling:
- Fold in the chopped shrimp lemon juice parsley and season well. Let it cool completely because hot filling will make your dough soggy and impossible to work with.
- Roll and cut:
- Roll your dough to about 1/8 inch thickness and cut circles with a 3 inch cutter or a drinking glass. Keep the scraps to reroll because every bit of dough matters.
- Fill and shape:
- Place a teaspoon of cooled filling in the center of each circle fold in half and seal edges tight with wet fingers. Press with a fork for that classic crimped look and extra security against leaking.
- Bread for frying:
- Dip each rissois in beaten eggs letting excess drip off then coat thoroughly in breadcrumbs. Place them on a baking sheet while you heat the oil.
- Fry to golden:
- Heat oil to 350°F and fry the rissois for 2 to 3 minutes per side until deep golden brown. Drain on paper towels and let them cool for just a minute before serving.
 Pin It
 My son asked me to teach him how to make these last weekend. We stood side by side at the counter flour dusting our arms and he laughed when I told him about my first attempt where half the filling leaked into the hot oil. Now his folding technique is better than mine.
Making The Dough Work For You
The dough might seem intimidating at first but it's actually very forgiving if you work with it while still slightly warm. If it tears just press it back together with damp fingers and keep going. Practice makes perfect and even ugly ones taste incredible.
Filling Variations To Try
While traditional shrimp rissois are amazing you can swap in crab meat or white fish if that's what you have. Some cooks add a pinch of paprika or cayenne to the filling for warmth. My aunt sometimes adds a tiny bit of white wine to her sauce.
Serving Suggestions That Shine
These are perfect on their own but a wedge of lemon on the side adds brightness. Some people love them with a light garlic aioli or spicy mayo for dipping. Serve them while still warm for that ultimate crispy to creamy contrast.
- Make extra because people will eat way more than you expect
- Keep finished rissois in a warm oven while you fry the rest
- Leftovers reheat beautifully in a 375°F oven for 10 minutes
 Pin It
 There's something deeply satisfying about serving these golden pockets of Portuguese comfort food to people you love. Every batch brings back memories of my avó's kitchen and creates new ones for the next generation.
Recipe Questions
- → What makes Portuguese rissois different from other fried turnovers?
-
Portuguese rissois feature a unique dough cooked directly in boiling milk and water mixture, creating a smooth, pliable pastry. The filling combines shrimp with a béchamel sauce base, resulting in an exceptionally creamy interior that sets them apart from other empanadas or savory hand pies.
- → Can I bake these instead of frying?
-
While traditional preparation calls for deep frying to achieve the signature crispy golden exterior, you can bake them at 400°F (200°C) for 15-20 minutes until golden. Brush with melted butter or oil before baking to help achieve a crispy texture, though the result will differ slightly from the fried version.
- → How long can I store uncooked rissois?
-
Assembled but uncooked rissois freeze exceptionally well for up to 3 months. Place them in a single layer on a baking sheet until firm, then transfer to freezer bags. Fry directly from frozen, adding an extra minute to the cooking time. Do not thaw before frying to prevent the filling from becoming watery.
- → What's the best oil temperature for frying?
-
Maintain the oil temperature between 350°F and 375°F (180°C-190°C) for optimal results. If the oil is too cool, the rissois will absorb excess grease and become soggy. If too hot, the exterior will burn before the interior heats through. Use a kitchen thermometer for consistent results.
- → Can I make these with other seafood?
-
Absolutely. While shrimp is traditional, you can substitute crab meat, white fish like cod or haddock, or even lobster. The filling technique remains the same—cook the seafood, create the béchamel base, and combine with aromatics. Adjust cooking times based on the seafood you choose.
- → Why does my dough turn out tough or sticky?
-
Tough dough usually results from overworking the flour once added to the liquid. Stir only until the dough forms and pulls away from the pan sides. Sticky dough indicates insufficient cooking time—continue cooking for another minute or two until the dough reaches the proper consistency. Letting it cool slightly before handling also makes it more manageable.
