 Pin It
 Master the art of creating golden, thick pan pizza with irresistibly crispy edges and a soft, chewy interior. This homemade version captures everything you love about the classic - from the buttery crunchy crust to that perfectly melted blanket of mozzarella. The dough requires just 45 minutes of rising time before pressing into well-greased cake pans, which create those signature caramelized edges everyone craves.
Top with your favorite pepperoni, vegetables, or meats, then brush the crust with olive oil for that beautiful golden finish. The result is two medium pizzas that serve four hungry people, each slice delivering that perfect crunch-to-chew ratio. Pair with cold lager or classic soda for the complete experience.
The smell that hit me when I opened that Pizza Hut box as a kid was something else. That thick, buttery crust with cheese practically caramelized at the edges. I spent years trying to recreate that magic in my kitchen, throwing away countless failed attempts that were either too bready or frustratingly flat. Then one rainy afternoon, I figured out that softened butter in the pan was the secret I had been missing all along.
My college roommate and I made this every Friday night during our sophomore year. We were broke but determined to have something better than the frozen stuff from the discount aisle. One time we got so excited about our creation that we forgot to put the pepperoni on until halfway through baking, creating this weirdly delicious layered effect that we pretended was intentional.
Ingredients
- 3 cups all-purpose flour: This is your foundation. Do not use bread flour or the texture will be too chewy and dense
- 2 ¼ tsp active dry yeast: Make sure your water is genuinely warm, not hot, or you will kill the yeast before it even gets started
- 1 ½ tsp sugar: Just enough to feed the yeast and help that crust develop that gorgeous golden color in the oven
- 1 ½ tsp salt: Do not skimp here. This is what makes the crust actually taste like something
- 1 cup warm water: Think bathwater temperature. Too cold and the yeast will sleep. Too hot and it dies
- 2 tbsp olive oil: This keeps the dough tender and adds subtle flavor to the crumb
- 2 tbsp unsalted butter: The real MVP. This creates that fried, crispy bottom crust that makes this recipe special
- 1 cup canned tomato sauce: Use whatever brand you like but avoid the chunky marinara styles
- 1 tsp dried oregano: Half the classic pizza flavor profile
- ½ tsp dried basil: The other half. Fresh herbs will burn in the high oven heat
- ½ tsp garlic powder: Do not use fresh garlic here. It will turn bitter and acrid when baked this long
- ½ tsp onion powder: Adds that background savory note that makes you keep coming back for another slice
- ½ tsp sugar: Cuts the acidity of the tomatoes and helps the sauce caramelize slightly
- Salt and black pepper: Season boldly. The sauce needs to stand up to all that cheese and dough
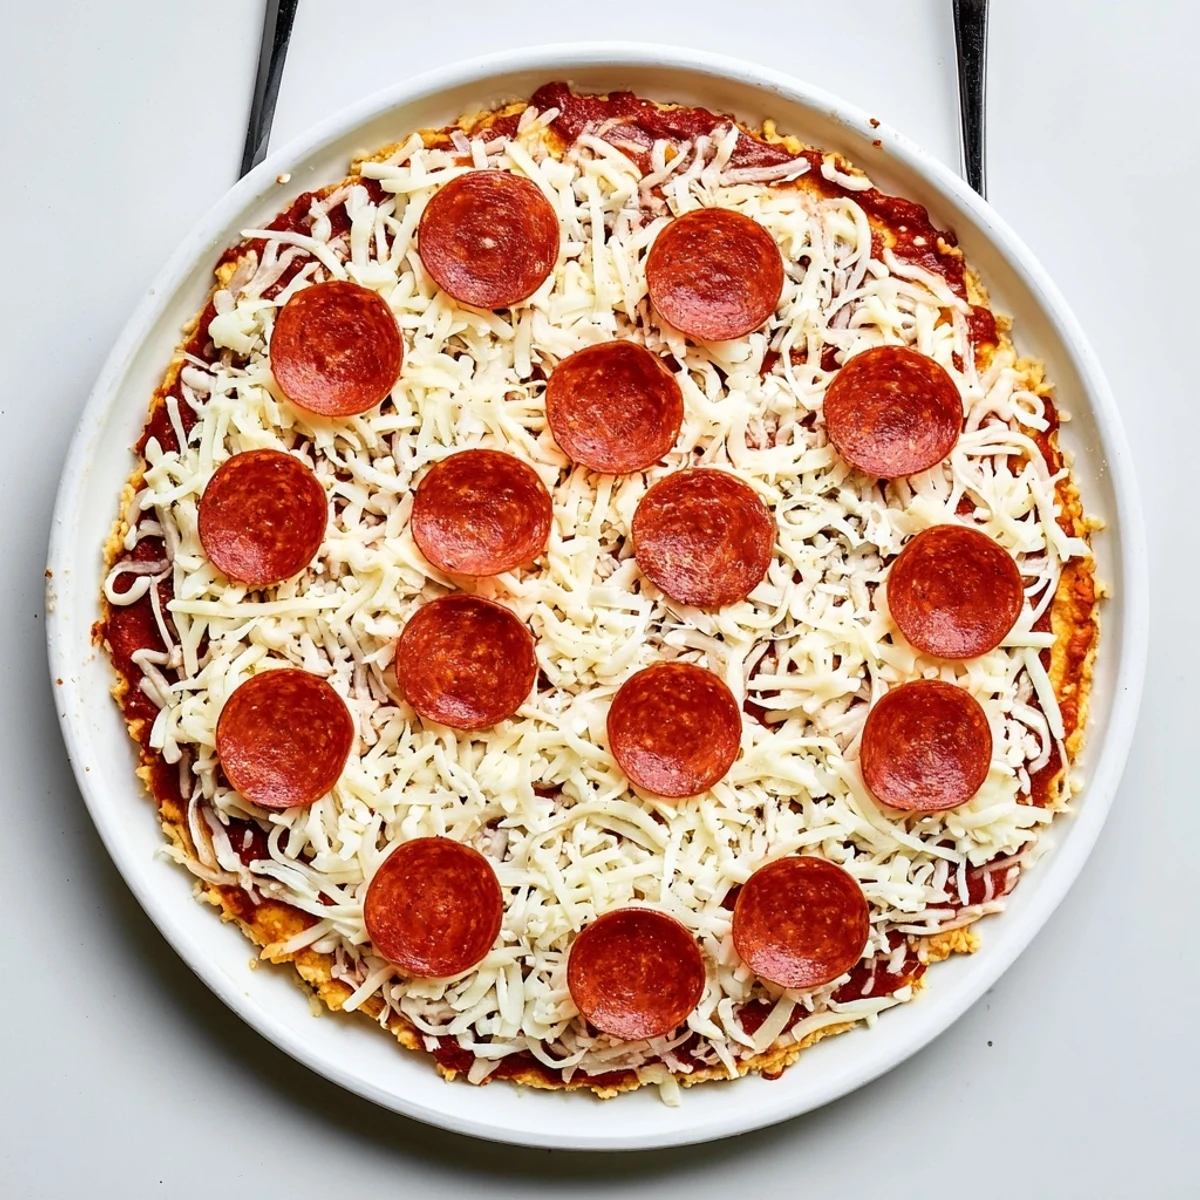
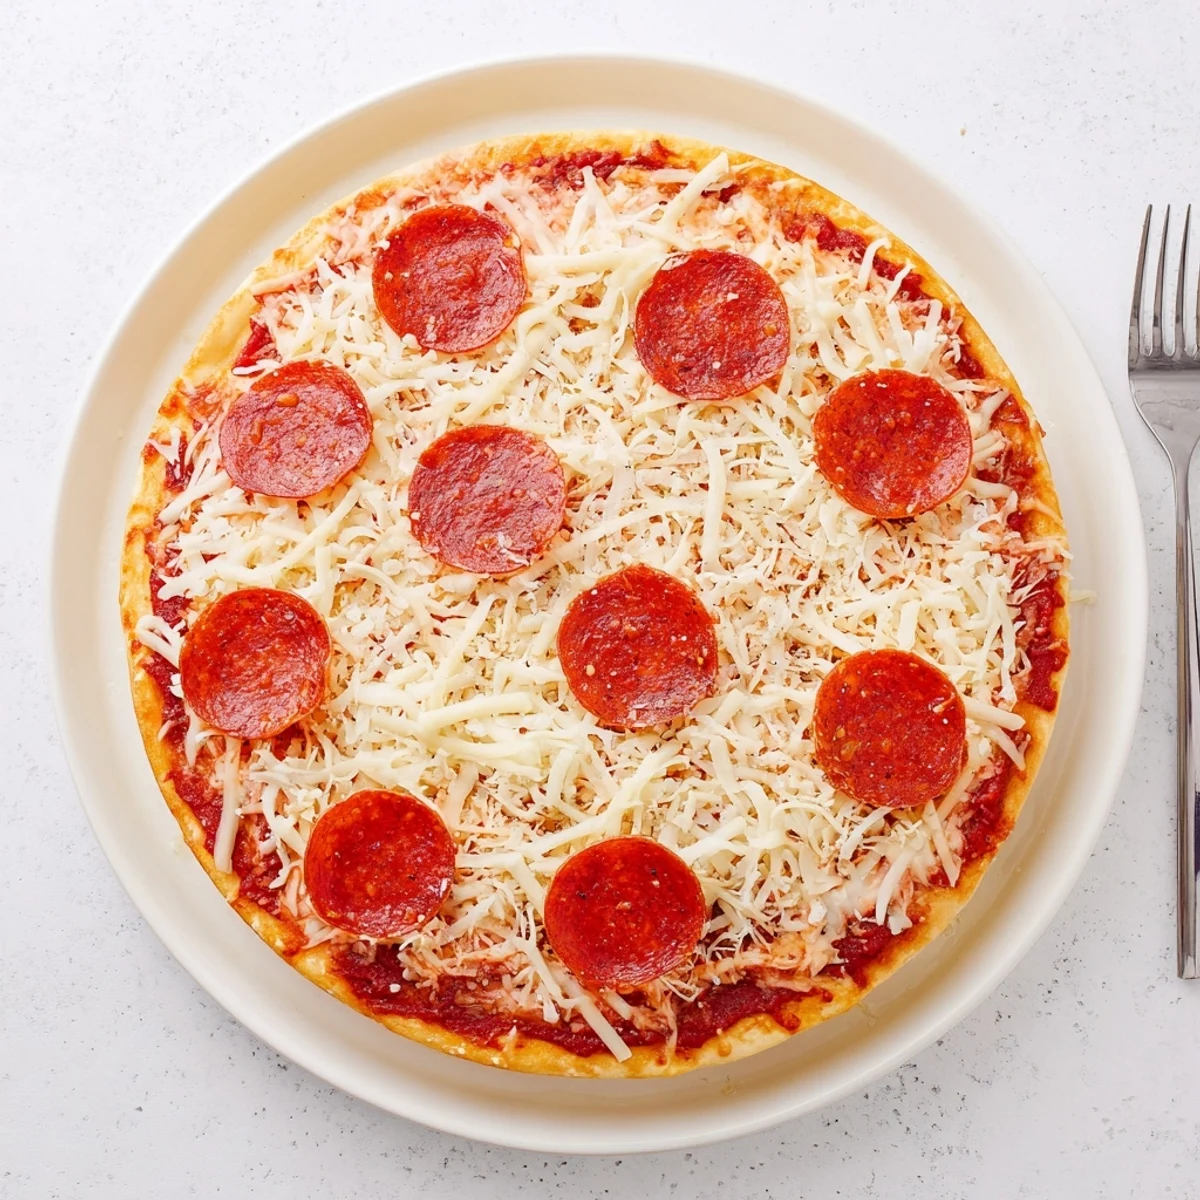
- 2 cups shredded mozzarella: Low moisture part skim is best. Too much moisture and your crust will get soggy
- 20-24 slices pepperoni: Or whatever toppings make you happy
- 1 tbsp olive oil: For brushing the crust. This gives you that beautiful golden finish
Instructions
- Wake up the yeast:
- Dissolve the sugar and yeast in that cup of warm water. You should see it get foamy and bubbly within about 5 minutes. If nothing happens, your yeast is dead and you need to start over with new yeast
- Mix the dough:
- Combine your flour and salt in a large bowl. Pour in the activated yeast mixture along with the olive oil. Stir until you have a rough, shaggy dough coming together
- Knead it out:
- Turn the dough onto a floured surface and knead for 7 to 8 minutes. You will feel it transform from sticky and rough to smooth and elastic. This is when the gluten develops, giving you that perfect chewy texture
- Let it rise:
- Lightly oil a clean bowl, place your dough inside, cover it, and tuck it away in a warm spot for an hour. The dough should double in size. This is when the magic happens
- Prep the pans:
- Grease two 9 inch round cake pans with softened butter. Do not be shy with it. Then brush a little olive oil on the bottom for extra crispness
- Shape the crusts:
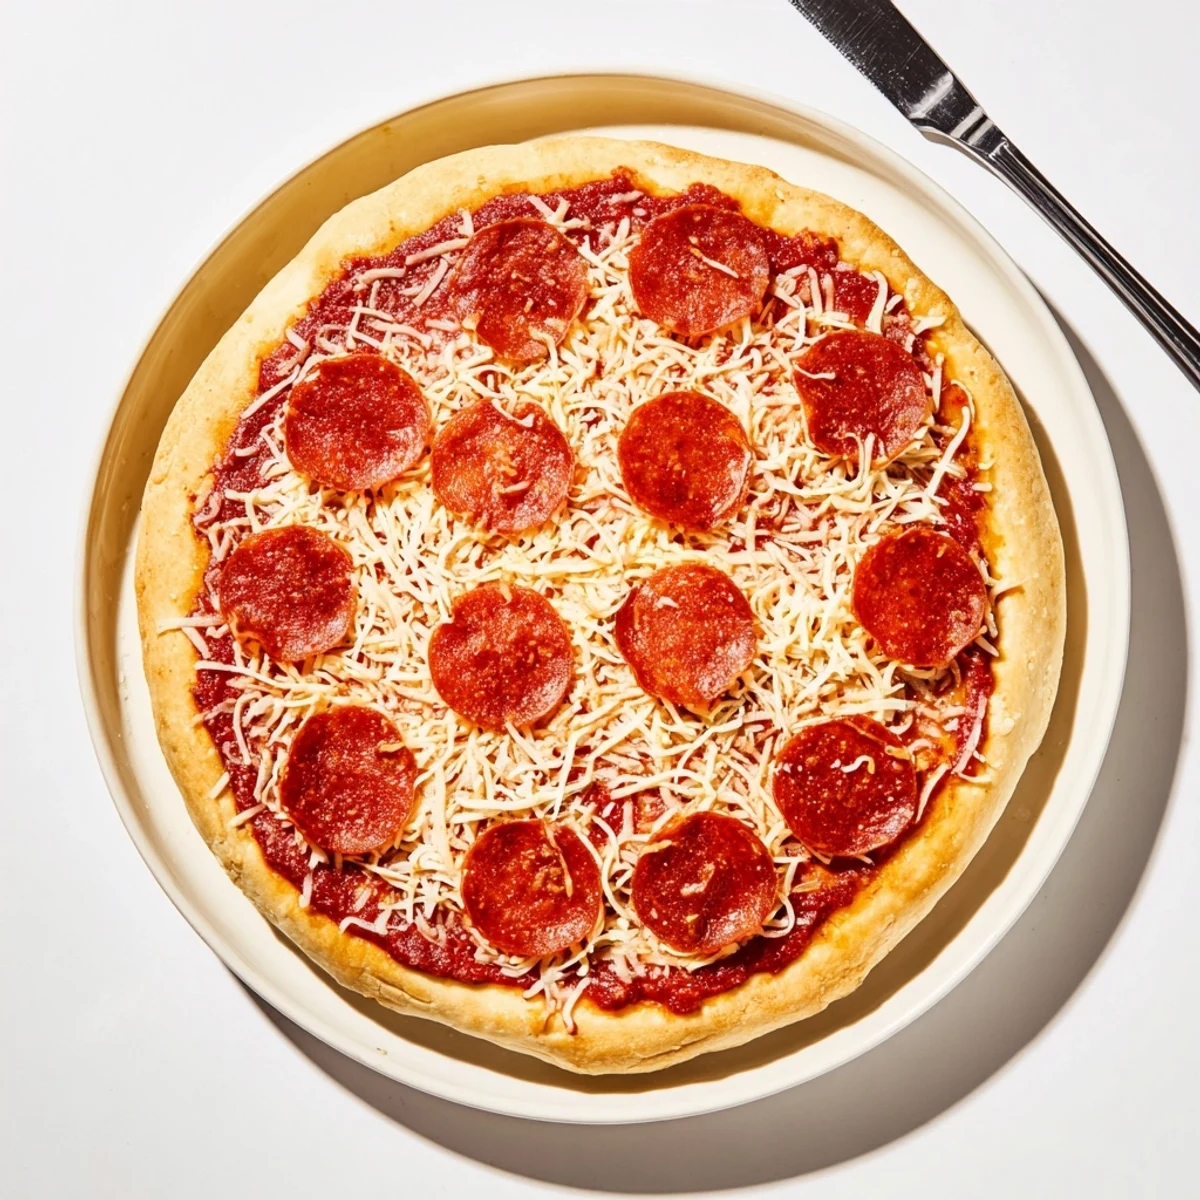
- Punch down that risen dough and divide it into 2 equal portions. Press each portion into your prepared pans, pushing the dough slightly up the sides to create that characteristic edge
- Rest again:
- Cover the pans and let the dough relax for 10 to 15 minutes. This prevents shrinking in the oven
- Crank the heat:
- Preheat your oven to 450°F. You want it screaming hot
- Mix the sauce:
- Combine all your sauce ingredients in a small bowl. Taste it and adjust the seasonings if needed
- Assemble:
- Spread half the sauce on each crust, leaving a small border for the crust edge. Sprinkle cheese evenly over the sauce and add your toppings
- Finish the crust:
- Brush the exposed crust edges with olive oil. This is what gives you that gorgeous golden color
- Bake to perfection:
- Bake for 20 to 25 minutes until the crust is deep golden brown and the cheese is bubbling with those irresistible browned spots
- Rest and serve:
- Let the pizzas cool for a few minutes before slicing. This lets the cheese set slightly so it does not slide off when you cut
 Pin It
 This recipe became my go to for birthday parties and game nights. Something about pulling those steaming pans out of the oven makes people gather in the kitchen. The last time I made it, my friend Sarah who swears she hates homemade pizza went back for three slices and took the rest home.
Make It Ahead
You can make the dough up to 24 hours in advance and let it rise slowly in the refrigerator. This actually improves the flavor and texture. Just bring it to room temperature for about 30 minutes before shaping.
Pan Choice Matters
I tried this in every pan imaginable. Cast iron gives you an amazing crust but can be tricky to clean. Dark metal cake pans are ideal because they conduct heat beautifully and encourage that crispy bottom. Glass or light colored pans will give you a paler, softer crust.
Sauce Secrets
The sauce thickens as it bakes, so do not worry if it looks thin going on. If you want to get fancy, let it simmer on the stove for 10 minutes to concentrate the flavors before spreading. Just do not make it too thick or it will turn into a paste.
- Add a pinch of red pepper flakes if you like some heat
- A splash of balsamic vinegar adds unexpected depth
- Let the sauce sit for at least 30 minutes before using
 Pin It
 There is something deeply satisfying about making pan pizza at home. The way the whole house fills with that unmistakable smell. Hope this recipe becomes a Friday night tradition for you too.
Recipe Questions
- → What makes the crust crispy?
-
The combination of butter-greased pans, olive oil brushed on the dough bottom, and high-heat baking at 450°F creates those signature crispy edges. The dough rests in the pan before baking, allowing the oil to penetrate and fry the bottom slightly.
- → Can I make the dough ahead?
-
Absolutely. For even better flavor development, let the dough rise slowly in the refrigerator overnight. The longer fermentation creates deeper flavor and a more tender crumb. Bring to room temperature before pressing into pans.
- → Why use cake pans instead of pizza pans?
-
Cake pans with higher sides help create the thick, fluffy interior while the metal conducts heat evenly for crispy bottoms. The depth allows the dough to rise upward, creating that distinctive pan pizza structure.
- → How do I prevent soggy centers?
-
Don't overload with sauce or watery vegetables. Pre-baking the crust for 5 minutes before adding toppings can help. Also, letting the dough rest in the pan before baking creates a barrier that prevents sogginess.
- → What cheese works best?
-
Low-moisture shredded mozzarella melts beautifully without excess water. You can mix in some provolone for extra flavor or add Parmesan to the cheese blend for a saltier bite that mimics the classic style.
