 Pin It
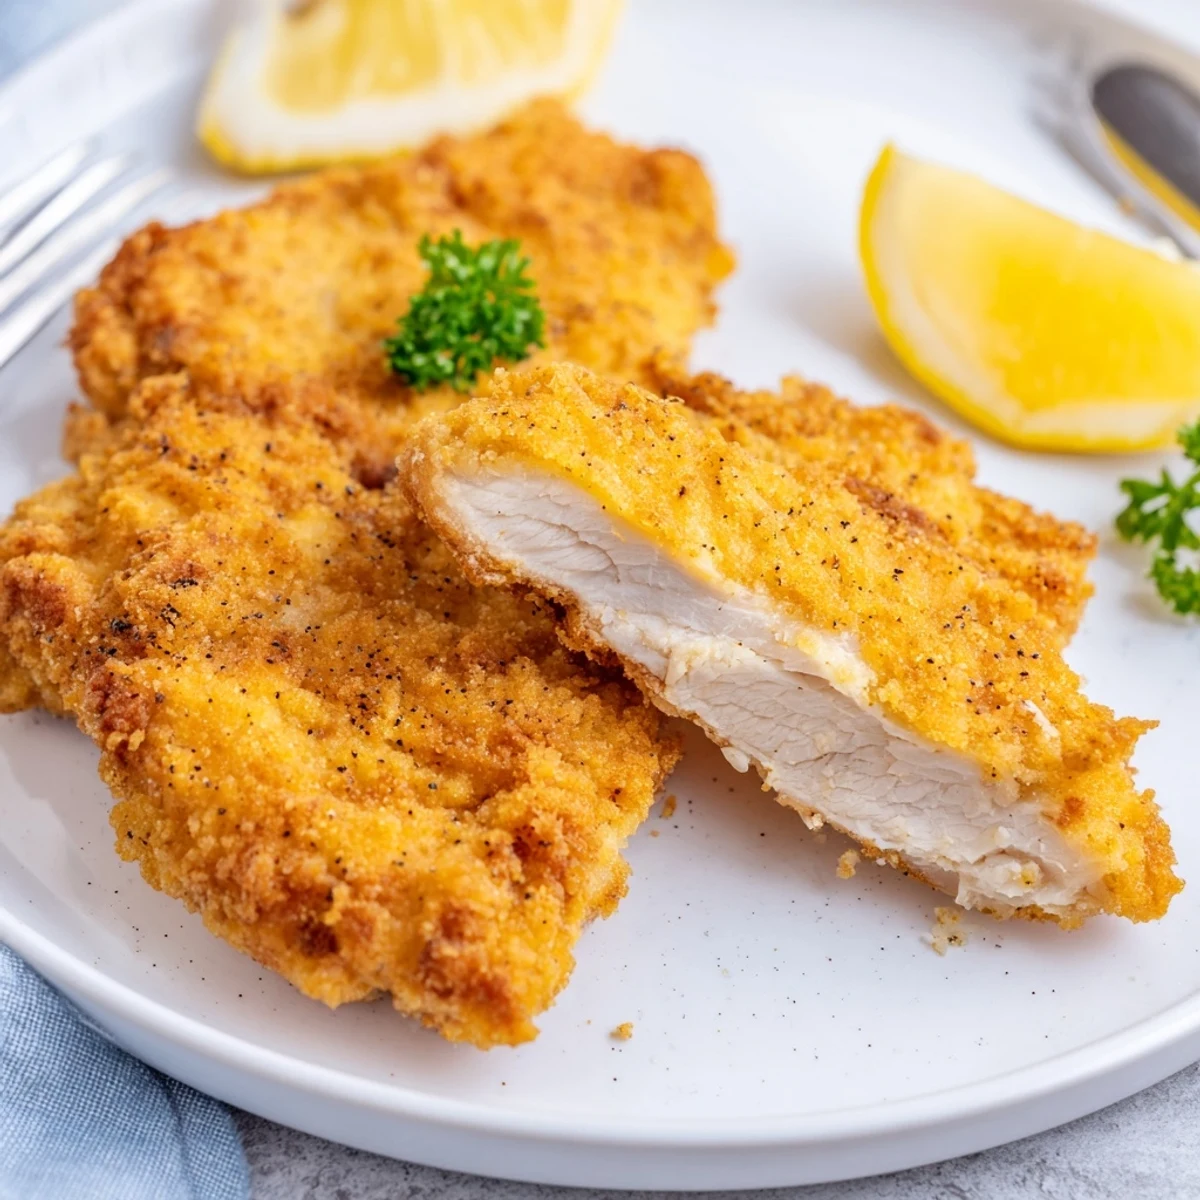
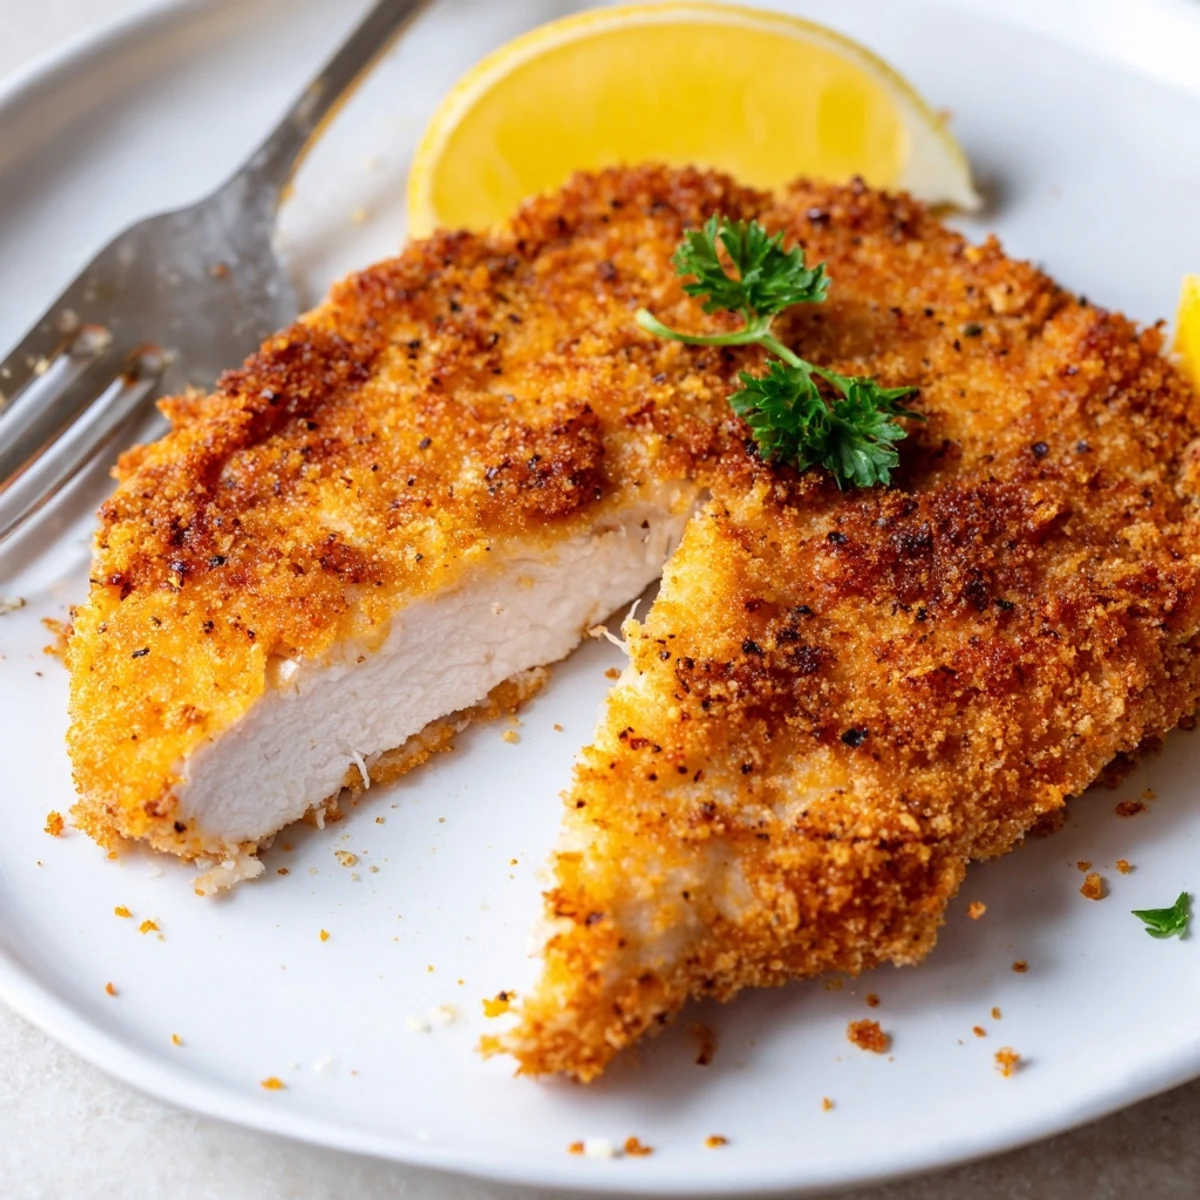
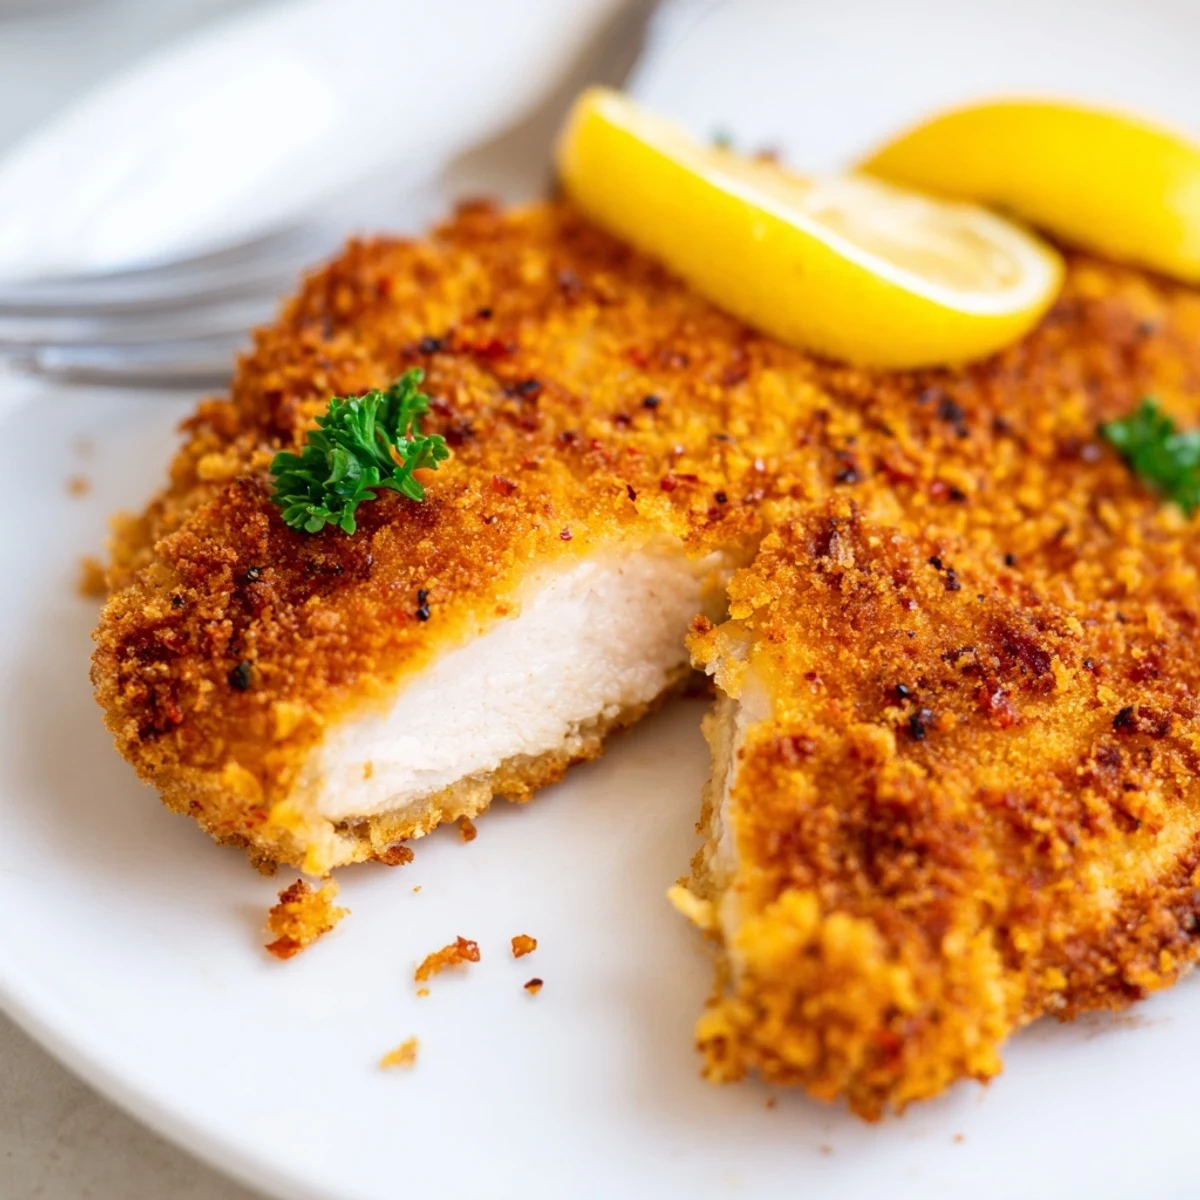
 Pound boneless chicken breasts to an even 1/2-inch thickness, brine in buttermilk with salt and pepper to tenderize, then dredge in a seasoned mix of flour and cornstarch for extra crunch. Fry in hot oil at 350°F (175°C) until golden and the internal temperature reaches 165°F (74°C). Let rest briefly before serving; pairs well with mashed potatoes or coleslaw.
The sound of oil popping in a cast iron skillet is one of those things that instantly pulls me into a good mood, no matter how the day has gone. There is something deeply satisfying about watching a piece of chicken transform from pale and wet to golden and shatteringly crisp. My neighbor Linda once followed the smell to my kitchen door and stood there grinning until I handed her a plate. That is the kind of recipe this is, the kind that makes people appear out of nowhere.
One rainy Tuesday I decided to test this recipe three different ways before a dinner party, and my partner walked in to find every surface covered in flour and three nearly identical skillets bubbling away. We laughed until we cried, and then we ate all three batches standing up at the counter.
Ingredients
- 4 boneless skinless chicken breasts: Pound them even so the thick parts do not dry out before the thin parts finish cooking.
- 1 cup buttermilk: This is the secret weapon that tenderizes and adds a subtle tang throughout the meat.
- 1 teaspoon salt and 1/2 teaspoon black pepper for the brine: These season from the inside out during the soak.
- 1 cup all-purpose flour: The base of the coating that creates structure for the crunch.
- 1/2 cup cornstarch: This is what makes the coating light and crispy rather than dense and bready.
- 1 teaspoon paprika: Adds warmth and a beautiful golden color to the crust.
- 1 teaspoon garlic powder: Layers in savory depth without burning like fresh garlic would.
- 1/2 teaspoon cayenne pepper (optional): A gentle heat that builds at the back of your palate.
- 1 teaspoon salt and 1/2 teaspoon ground black pepper for the coating: Do not skip this because the flour needs its own seasoning.
- Vegetable oil for frying (about 2 cups): Use a neutral oil with a high smoke point for the cleanest fry.
Instructions
- Flatten the chicken:
- Place each breast between two sheets of plastic wrap and pound gently with a mallet or rolling pin until about half an inch thick. You want them even, not annihilated, so let the tool do the work.
- Make the buttermilk bath:
- Stir together the buttermilk, a teaspoon of salt, and half a teaspoon of pepper in a bowl big enough to hold all four breasts. Submerge the chicken and let it soak at least thirty minutes, or up to four hours in the fridge if you have the time.
- Build the coating station:
- In a wide bowl, whisk the flour, cornstarch, paprika, garlic powder, cayenne if you are using it, salt, and pepper until evenly combined. Have a plate or sheet pan ready next to it for the coated pieces.
- Dredge with intention:
- Pull each breast from the buttermilk, let the excess drip off for a second, then press it firmly into the flour mixture on both sides. Really press the coating into every crevice because that is what creates those irresistible craggy bits.
- Heat the oil:
- Pour about an inch and a half of oil into a large skillet or deep pan and bring it to 350 degrees Fahrenheit over medium heat. Use a thermometer if you have one because the right temperature is everything.
- Fry in batches:
- Carefully lower two pieces at a time into the hot oil and fry for six to seven minutes per side until deeply golden and cooked through to 165 degrees Fahrenheit inside. Do not crowd the pan or the temperature drops and you get greasy chicken.
- Rest before serving:
- Transfer each piece to a paper towel lined plate and let it rest for two to three minutes so the crust sets and the juices settle. This tiny pause makes a huge difference in texture.
 Pin It
 The first time I served this to my mother in law, she closed her eyes after the first bite and did not say a word for an entire minute. I almost panicked, but then she looked at me and said I had finally done something right with my life. We still laugh about it every time she asks for the recipe.
Serving Suggestions That Actually Work
Piled onto a toasted brioche bun with pickles and a smear of honey mustard, this chicken becomes the sandwich your friends will text you about at midnight. Over a bed of creamy mashed potatoes with the extra crispy edges facing up, it is pure Sunday dinner comfort. A simple coleslaw on the side cuts through the richness and makes the whole plate sing.
Getting Ahead and Storing Leftovers
You can marinate the chicken the night before and keep it in the fridge, which makes the actual cooking feel almost effortless the next day. Leftovers stay crisp in a 375 degree Fahrenheit oven for about ten minutes, though honestly they rarely last that long in my house. I have also chopped up cold leftover pieces over a salad the next day and it felt like a completely different meal.
Making It Your Own
Once you have the basic technique down, this recipe becomes a canvas for whatever flavors you are craving. Swap the paprika for smoked paprika if you want a deeper campfire quality, or add a tablespoon of hot sauce to the buttermilk for a Louisiana style kick. Gluten free flour blends work beautifully in place of all-purpose flour, so no one has to miss out.
- Try a pinch of onion powder in the flour for an extra layer of savoriness.
- A dash of hot honey drizzled over the finished chicken changes everything in the best way.
- Always taste your flour mixture before you coat the chicken so you can adjust the seasoning.
 Pin It
 Fried chicken does not need a special occasion, but somehow it always creates one. Make this once and it will become the dish people request from you forever.
Recipe Questions
- → How long should I marinate the chicken?
-
Marinate at least 30 minutes for basic tenderness; for best results refrigerate up to 4 hours or overnight to deepen flavor and juiciness.
- → How do I get an extra-crispy crust?
-
Add cornstarch to the flour, press the coating firmly onto the meat, and avoid overcrowding the pan so the oil temperature stays steady for crisping.
- → What oil temperature should I use for frying?
-
Heat oil to about 350°F (175°C). That temperature yields a golden crust while cooking the breast through without overbrowning.
- → How can I ensure the chicken stays juicy?
-
Pound to even thickness, brine in buttermilk to tenderize, and monitor internal temperature—remove at 165°F (74°C) and let rest a few minutes before serving.
- → Can I make a spicier version?
-
Increase cayenne in the coating or add smoked paprika and a pinch of chili powder to the flour mix for a bolder kick.
- → What's the best way to reheat leftovers?
-
Reheat in a 350°F oven on a wire rack so the crust regains crispness; a quick finish in a hot skillet works well for small portions.
